
Walleye Jigging: Vertical + Casting Jig Heads, Plastics, Weight & Cadence — The Complete System
Walleye Jigging: Vertical + Casting
Jig Heads, Plastics, Weight & Cadence — the Complete System
Jigging is the most versatile walleye presentation — it works from ice-out through post-spawn, covers bottom-oriented and current-holding fish, and adapts to any depth, wind, or clarity condition. This hub covers jig weight selection, cadence rules for active and inactive fish, the three plastic profiles that cover every mood, and the line system that keeps you in contact with the bottom. Start here, then use the setup guide and supporting articles for the deep dive on any piece of the system.
Last updated: May 2026 · By: FishUSA Staff
Start Here (Pick Your Conditions)
Quick decision rules
- If fish are on the bottom and located: go vertical. Drop straight down, maintain contact, and work the strike zone precisely. This is the high-percentage move on pre-spawn staging edges and current seams.
- If you need to cover water or fish structure at an angle: cast the jig. Points, rock piles, and shallow flats are more efficiently worked on a cast-and-retrieve than a straight vertical drop.
- Not sure what weight to use: start with 1/8 oz in calm, shallow water. Add weight as wind or depth increases. The goal is the lightest head that still gives you bottom feel. → Jig Weight Guide
- If fish are visible on sonar but not biting: slow down. Switch to a minnow or straight-tail plastic and drop cadence before changing spots or color.
- If fish are suspended off the bottom and won’t come down: jigging is the wrong tool. → Cold-Water Jerkbait Hub
Vertical Jigging vs Casting a Jig
Both presentations use the same jig heads and plastics — the approach determines how precisely you can control depth, angle, and drift. Use the method that matches your structure and how the fish are positioned.
Vertical jigging
- Best for: located fish on specific depth, current seams, staging edges
- Maximum sensitivity — braid transmits soft bites directly
- Precise depth control — work a 1–2 ft zone exactly
- Less snag risk when fishing directly below the boat
- Requires boat control — drift speed must match current or wind
- Key tell: if line goes slack during the fall, set the hook
Casting a jig
- Best for: covering water, points, flats, shallow rock piles
- Work structure at angles the boat can’t get directly over
- More effective search presentation when fish aren’t pinpointed
- Retrieve at any speed — hop, swim, or drag back to the boat
- Less sensitive than vertical — braid is critical to detect bites on the fall
- Key tell: watch the line for ticks or slack on the drop
When to switch: if vertical produces no bites but you’re marking fish, try a fan-cast to change the angle. If casting isn’t finding fish, lock onto a depth contour and work it vertically — depth precision beats water coverage when fish are tight.
Jig Weight by Depth and Conditions
Use the lightest head that keeps you in contact with the bottom. Weight affects how fast the jig falls, how long it stays in the strike zone, and how much action the plastic displays on the drop. When in doubt, start lighter and add weight — going too heavy kills the fall-action that triggers most bites.
| Depth | Calm / Light Wind | Moderate Wind | Heavy Wind / Current |
|---|---|---|---|
| Under 8 ft | 1/16–1/8 oz | 1/8–3/16 oz | 1/4 oz |
| 8–15 ft | 1/8–1/4 oz | 1/4–3/8 oz | 3/8–1/2 oz |
| 15–25 ft | 1/4–3/8 oz | 3/8–1/2 oz | 1/2–3/4 oz |
| 25+ ft | 3/8–1/2 oz | 1/2–3/4 oz | 3/4–1 oz |
Weight adjustment rules
- Lost bottom contact: go up one weight increment. If you still can’t feel bottom after that, slow your drift before adding more weight.
- Jig is dragging too much: go lighter. If the jig is barely falling between hops, you’re presenting it too slow for active fish.
- Wind increasing: add weight before you lose feel, not after. It’s easier to stay dialed in than to re-establish contact.
- Tungsten vs lead: tungsten is denser — a 1/4 oz tungsten head is physically smaller than 1/4 oz lead, which means a faster fall and better feel at the same weight.
Full breakdown with wind and drift charts: Walleye jig weight chart
Cadence: Three Retrieves and When to Use Each
Walleye jigging cadence is not one retrieve — it’s a progression you run through when bites slow. Active fish respond to sharper movements and shorter pauses. Neutral and cold-water fish need slow, deliberate presentations with longer hangs in the strike zone. Work through cadence before you change the plastic or the spot.
| Retrieve | Best For | How to Execute | When to Use |
|---|---|---|---|
| Lift-hop-pause | Active fish, any depth | Lift rod 1–2 ft sharply, let jig fall on semi-slack line, pause 1–3 sec, repeat | Starting retrieve — covers water, draws strikes on the fall. Works best when fish are feeding actively. |
| Slow drag-lift | Neutral or cold-water fish | Drag jig along bottom slowly, lift 6–8 inches, pause 3–5 sec, repeat | When fish are seen on sonar but not striking hop retrieve. Keeps jig in the zone longer without fast movement. |
| Swim retrieve | Casting on flats, search | Cast, let jig sink to bottom, reel slowly with occasional rod lifts — keep jig just off the bottom | Covering shallow flats and points on a cast. Best with paddletail plastic for maximum action at slow retrieve speed. |
Cadence adjustment sequence
- No bites on hop retrieve: slow down. Drop to drag-lift before changing plastics or spot.
- Fish following but not committing: extend the pause. Let the jig sit 3–5 seconds on the bottom before the next move.
- Short bites (feeling nips but missing fish): slow the hookset. Let the rod load before sweeping — pulling too fast pulls the hook from a lightly loaded fish.
- No activity at all: move spots before opening the tackle box. No cadence fix works if fish aren’t present.
Full cold-water cadence breakdown by temperature: Cold-water walleye jig cadence
Plastic Profiles: Three Choices That Cover Every Mood
You don’t need 20 bags of plastics — you need three profiles. A paddletail for searching, a minnow for neutral fish, and a ringworm for finicky conditions and current. Carry both natural and chartreuse in each profile and you’re covered for any spring situation.
Profile decision rules
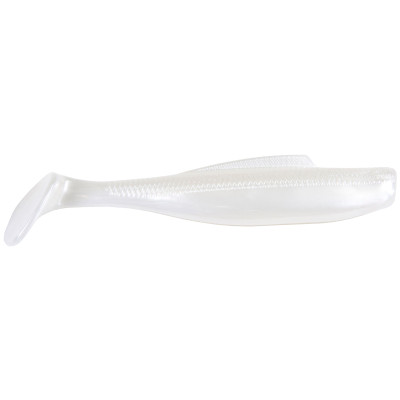
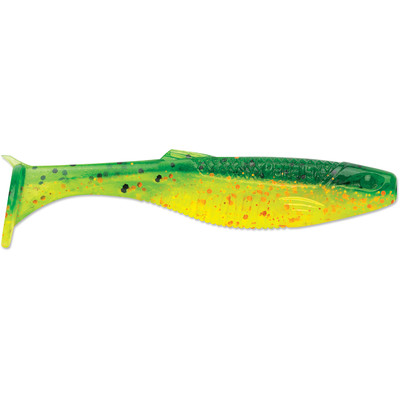
- Paddletail (3.5–4 in): start here. The vibrating tail draws fish in and works at multiple retrieve speeds. Best search bait when fish aren’t precisely located. Works at any temp but shines above 44°F when fish are willing to chase.
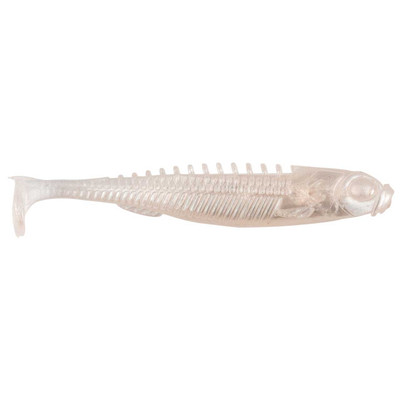
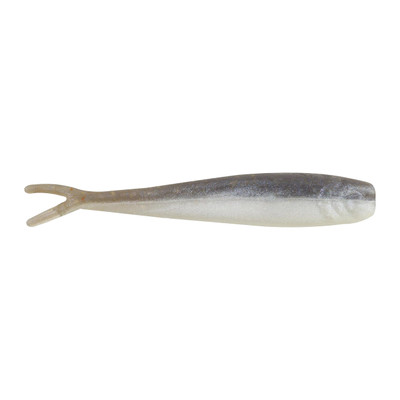
- Minnow / straight tail (3–4 in): switch to this when fish are located but neutral — when the paddletail gets follows but no bites. Less action, slower fall, more natural profile in clear water. B Fish N Tackle RibbFinn and Z-Man Scented Jerk ShadZ are the go-to options.
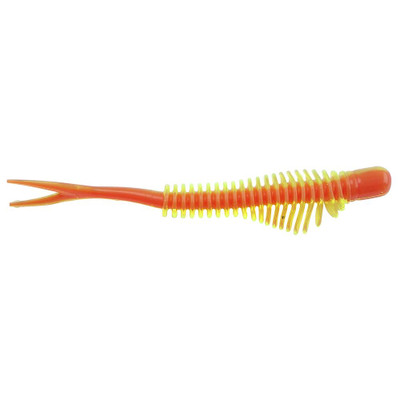
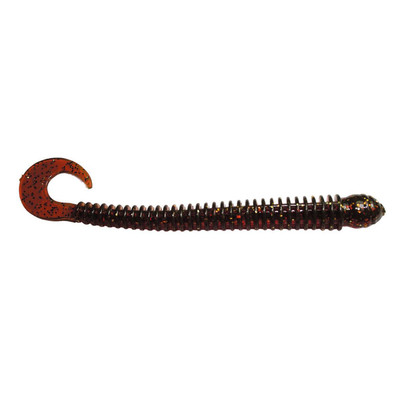
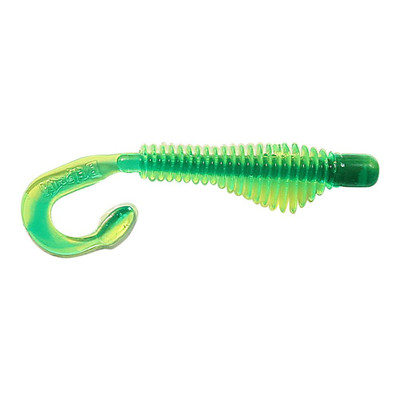
- Ringworm / curl tail (3–4 in): finesse option for finicky bites, current seams, and ultra-cold water under 42°F. The thin tail creates micro-action on the fall that minimal retrieve speed is needed to trigger. Also effective when fish are short-striking — smaller profile means more hook-ups.
Natural colors (clear water)
- Shad, smoke, goby, pearl, perch patterns
- Subtle flash — matching the local forage
- Translucent bodies in bright, sunny conditions
- Start natural in clear water — shift bright if no response
Bright colors (stained / low light)
- Chartreuse, white, orange, fire tiger
- High-contrast combos: chartreuse + black, white + red
- Glow tails for overcast days or deeper presentations
- Don’t skip chartreuse in stained water — it works
Full spring jigging parts list with all plastic options: Spring Walleye Jigging Setup
Where to Fish (Location by Season Stage)
A jig in the right location always outperforms the best jig in the wrong one. Walleye location in spring follows water temperature, forage position, and structure. Use the temperature windows below to narrow down where fish are holding before you commit to a spot.
- 38–44°F (pre-spawn staging): fish are on the first major break — the transition between shallow gravel or rock and deeper water. Look for 8–18 ft staging edges adjacent to spawning gravel. Fish will stack here and hold tight to the bottom. Vertical jigging directly on the edge is the highest-percentage approach. → Pre-spawn staging map
- 44–50°F (spawn and immediate post-spawn): fish move shallower onto gravel and rock. Current-influenced areas — river mouths, narrows, and wind-blown shorelines — become prime. Jigging current seams and transition zones from boat or shore both work. Keep the jig in the current edge without dragging into fast water.
- 50–58°F (post-spawn recovery): fish scatter. Some move to adjacent flats; others suspend in open water temporarily. This is the best time to cast a jig across shallow points and flats and cover water. Fish are recovering and feeding actively — they respond to faster retrieves.
- Across all stages: wind-blown structure concentrates fish. A rocky point or break that has been absorbing wind for 12+ hours will often hold more fish than calm-side structure. The wave action pushes forage, and walleye position to ambush.
Temperature-by-temperature location breakdown: Spring walleye water temp triggers · Spring Walleye Hub
What to Buy Now (Walleye Jigging System)
Start simple: one quality round-head jig in 3 weights (1/8, 1/4, 3/8 oz), a paddletail and a minnow profile in natural and chartreuse, and a braid-to-fluoro setup. That covers 80% of spring jigging situations. Add specialty jig heads and more profiles once you know which conditions you fish most.
Start-to-Finish Spring Walleye Jigging Kit
Jig head + paddletail + minnow profile + braid + fluoro leader — one purchase, ready to fish


Round, Stand-Up & Tungsten Options (1/8–1/2 oz)
Cover every depth and wind condition — carry at least 3 weights to stay dialed in through the day


Paddletail + Minnow + Ringworm (Every Mood)
Start with a paddletail to search · drop to a minnow for neutral fish · finesse with a ringworm

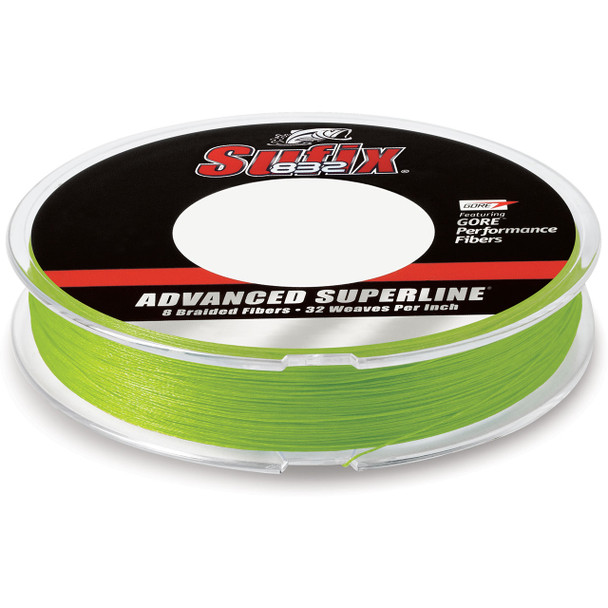
Braid Mainline + Fluorocarbon Leader
Braid for bottom-feel · fluoro leader for stealth · or run straight fluoro in ultra-clear water
Want the full parts list? → Complete Spring Walleye Jigging Setup — every jig head, plastic, and terminal component with kit presets and rigging instructions.
Supporting Guides
This hub gives you the framework. Each guide below is the deep-dive on one specific part of the jigging system — bookmark the ones that match where you need more detail.
- Complete Spring Walleye Jigging Setup — every component, weight range, rigging instructions, and a full on-the-water playbook for spring conditions.
- Walleye jig weight chart — exact weight ranges by depth and wind so you stop guessing and start fishing with the right head.
- Cold-water walleye jig cadence — retrieve rules and pause timing for water temps from ice-out through 50°F.
- Spring walleye water temp triggers — what temperature windows move fish to staging edges, spawning areas, and post-spawn recovery zones.
- Pre-spawn walleye staging map — where fish hold before the spawn and how to read a map to find the right depth edge before you hit the water.
Read Next
Dig deeper on jigging technique, gear, and spring walleye location with these supporting guides.
FAQ
Common questions about walleye jigging — weight selection, cadence, line setup, and when to switch presentations.