/
/
Before walleyes reach the spawning gravel, they stack on a handful of high-percentage staging features — the first major break, main-lake points, inside turns, and current seams. This guide maps those exact spots, explains what makes each one productive, and shows you how to fish them with a jig.
Last updated: April 2026 · By: FishUSA Staff
If you read nothing else, read this
Pre-spawn walleyes don't wander. They follow the most efficient travel lane from their deep winter hold to the spawning grounds and stop at the best staging features along the way. Think of it as a highway with rest stops: deep wintering basin → first major break → staging structure → spawning flats. The fish are almost always at one of those "rest stops" rather than in the open water between them.
Feature 1
Breaks — The First and Second Drop
The first break is the initial depth change from the spawning shallows into deeper water — often the most productive single structure in early spring. Fish use it as a staging shelf: they can slide up into the shallows at dusk or push back to deep water during cold fronts without traveling far. Where fish sit on the break: in cold water (below 44°F), look at the base of the break or on the adjacent flat. As temps rise into the mid-to-upper 40s, fish move up to the face and eventually the top of the break. The second break — if there is one — holds overflow fish and fallback fish after fronts.
Feature 2
Points — Funnel Spots on Every Lake
Main-lake points that extend toward deep water act as funnels: fish moving along the break on their way to spawning areas must pass around or over the point tip. This creates predictable concentration. Wind-facing points produce when wind pushes bait against them; protected inside points win during cold fronts when fish pull back and look for calmer water. Secondary "short points" — small projections off a bigger shoreline feature — often hold fish when the main points are pressured. Fish the tip first, then work both sides along the break.
Feature 3
Inside Turns + Depressions — "Parking Lots"
Where a shoreline curves inward, the inside turn collects wind-blown bait and plankton — anywhere current or wave action causes convergence, you get a food funnel. Fish stage in inside turns because the food comes to them. Small bottom depressions and ditches adjacent to breaks serve as micro holding areas: a 2–3 foot depression in an otherwise flat bottom gives fish a defined "home base" and ambush lane. These spots are repeatable year after year and fish hard even on tough days.
Feature 4
Bottom Transitions — The Invisible Lines
A change in bottom composition — rock to mud, gravel to sand, hard bottom to soft — creates a repeatable line that walleyes use to orient. Baitfish stack on the harder substrate edges; forage invertebrates concentrate in the transition zone. The result is a defined travel corridor that functions the same way a breakline does. On lakes with dreissenid mussels, the mussel line (typically the lower edge of where they colonize, around 18–25 ft on many Great Lakes bays) is its own distinct transition and walleye edge.
Fast locator rule
Find two of three: (1) quick access to depth, (2) a defined travel edge, (3) a food trigger — wind convergence, current, or a bottom transition with bait. If you have two out of three, the spot is worth fishing. All three means it's your first cast of the day.
Run this checklist on any potential staging spot — whether you're reading a map at home, idling with electronics, or scouting from shore. You don't need all five, but the more boxes checked, the higher-percentage the spot.
In rivers, the structural logic is identical to lakes — fish stage where they can rest and ambush without fighting current — but the features look different. Instead of breaks and points, you're reading seams, eddies, and obstructions. The principle is always: slow water next to fast water, with forage in between.
Current weight rule
If your jig is drifting too fast to maintain consistent bottom contact, treat it the same as a "one wind column heavier" scenario from the jig weight chart. Current affects your line far more than still-water wind at the same speed. In a moderate river current, start at 1/4 oz minimum regardless of depth, and step up until you feel the bottom distinctly on every drop. A jig that can't find the bottom isn't fishing.
Your presentation angle determines whether the jig is fishing or just dragging. The closer your line is to vertical, the more sensitivity you have, the slower the jig falls, and the longer it stays in the strike zone. Angle matters as much as weight selection.
From the Boat
Set up up-current or upwind, work down the edge
Position the boat upwind or upcurrent of the staging area and let a controlled drift carry you along the break. Short, precise drifts of 50–100 yards along the edge beat anchoring and casting from one spot. Keep the rod nearly vertical — if your line is at more than a 30° angle to the surface, you're losing feel and letting the jig slide through the zone too fast. Use a drift sock if wind is too strong; the goal is a drift speed that gives you 5–10 seconds of bottom time per drop.
From Shore
Cast at 45° to the break, walk the bait down the contour
Don't cast straight out and retrieve straight back — you'll cross the break once at speed and spend the rest of the retrieve on the wrong side. Instead, cast at a 45° angle parallel or angled to the break, then use a slow, side-swinging retrieve that walks the jig down the contour. Keep contact throughout. If you're snagging constantly, change your angle before you change your spot — most snag problems from shore are a line angle problem, not a weight problem.
This isn't about fancy techniques. Pre-spawn walleye jigging is about finding the line, staying on it, and maintaining bottom contact longer than you think is necessary. Four steps, in order.
More detail on these techniques
Keep it simple. You don't need a full tackle box for pre-spawn walleyes — you need a confidence bait, a search bait, and a finesse option. Start natural in clear water, start contrast in stained. Change bait only after you've ruled out weight and cadence.
Step 1 · Start
Minnow Profile
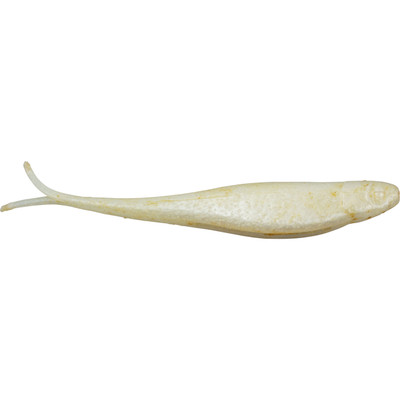
Straight-tail or soft jerkbait on a jig head. Slow fall, subtle action, matches the primary forage (shad, perch fry, shiners) in most spring systems. Natural white, smelt, or shad in clear water; chartreuse-white or orange core in stained. This is your confidence bait — fish it until conditions tell you to change something other than the lure.
Step 2 · Search
Paddletail
3.5–4 in paddletail when you need to cover water. The tail vibration and slightly faster retrieve let you prospect a longer section of break before committing to a slower presentation. Switch to the paddletail when fish are scattered, when you're on a new spot, or when temps push past 50°F and fish are more willing to move. Pro blue red pearl or white in clearer water; chartreuse or yellow perch in stain.
Step 3 · Finesse
Ringworm
4 in ringworm when bites are short or fish are being finicky. The slow flutter fall and thin profile get bit when fish are looking at everything. Motor oil, green pumpkin, or chartreuse. Fish it slower than you think — basically dead-drift along the break with very light lifts. If a fish bumps the minnow twice without committing, switch to the ringworm at the same spot and slow down.
Spring Walleye Jigging System
Jig heads + soft plastics — one rotation covers every staging depth and mood
Most missed fish in pre-spawn come down to four repeatable errors. All are fixable once you know what to look for.
Still struggling? Check your whole setup
If you've fixed weight, cadence, and location and still aren't finding fish, the problem is often the complete setup — rod sensitivity, line diameter, leader length, or jig hook size. The spring jigging setup guide walks through each component and what it does.
Pre-spawn walleyes stage on the first high-percentage structural features on the route between their deep winter hold and the spawning grounds — typically the first major depth break adjacent to spawning flats, main-lake points that project toward shallow rock or gravel, inside turns that collect bait and offer wind protection, and bottom transitions where rock meets mud or sand. They concentrate where depth access, a travel edge, and a food trigger overlap. They're not randomly scattered.
Start at the first major break — usually 8–15 feet on most Great Lakes inland systems, 12–20 feet on deeper natural lakes. Below 44°F, look at the base of the break or the adjacent flat. In the mid-to-upper 40s, fish move up to the break face and become more catchable. The key variable is water temperature, not a fixed number. See the water temp triggers guide for how depth shifts with temperature.
In a slow, steady warming spring, fish can hold on the same staging break for 2–3 weeks. In a volatile spring with repeated cold fronts, they'll slide deeper and shallower with each front. After a cold snap, give fish 1–2 days to stabilize before fishing the same spot again. The most productive staging windows are typically the 7–14 days before peak spawn when temps hold consistently in the 44–50°F range.
Start with drag-pause-drag: drag the jig along the bottom 12–18 inches, pause 2–3 seconds, repeat. In colder water (below 46°F), slow the drag to a near-crawl and extend the pause to 4–5 seconds. Once temps push past 50°F, you can incorporate a light snap-lift followed by a controlled fall. Most spring bites come on the pause or at the beginning of the next drag when the jig first loads up.
In rivers, look for the same principle — fish want to rest and ambush. Target current seams where fast water meets slow, the downstream side of wing dams, bridge pilings, tailouts below riffles, and eddies on inside bends. Fish hold on the seam edge, not in the fastest current. Use more weight than you would in still water — current affects your line more than your jig. Short, vertical presentations are more effective than long casts at severe angles in moving water.
Yes — early spring is one of the best shore-fishing windows. Target points and inside turns you can reach, cast at a 45° angle to the break rather than straight out, and walk your jig along the contour. The goal from shore is bottom contact throughout the retrieve, not casting distance. A 1/8–1/4 oz jig with a minnow profile fished slowly down a rocky point in 40–55°F water will produce. Dawn and dusk matter more from shore than midday.
On a contour map: a point or inside turn with access to deeper water on at least one side, a break steep enough to give fish a defined edge, and proximity within a half-mile of a known spawning area. On satellite view: rocky or gravel structure in adjacent shallows. On a fish finder: bait stacked at or near the break. Two out of three of these signals is worth fishing; all three is your first cast.
Yes — structure doesn't change, so staging areas are consistent year to year. Timing and depth vary with each season's temperature progression, but fish use the same breaks, points, and transitions annually. Once you find a productive pre-spawn spot, mark it and fish it every year. Adjust depth and presentation based on conditions, but trust the spot.
Use the lightest jig that maintains consistent bottom contact. For most pre-spawn situations — 8–20 feet, light to moderate drift — that's 1/8 to 1/4 oz. Add weight for deeper water, stronger current, or wind-driven drift. The diagnostic test: drop to the bottom and hop twice. If you can feel a distinct tick when it lands and differentiate rock from mud, you're in the right range. See the full jig weight chart for a depth-and-wind reference.
Hook Me Up!
Sign up for emails and texts to get exclusive updates and offers.
By providing your number above, you agree to receive recurring automated marketing text msgs (e.g. cart reminders) to the mobile number used at opt-in from FishUSA on 25043. Consent is not a condition of purchase. Msg frequency may vary. Msg & data rates may apply. Reply HELP for help and STOP to cancel. See Terms and Conditions & Privacy Policy