
Complete Walleye Harness + Bottom Bouncer Setup
Complete Walleye Harness + Bottom Bouncer Setup
This page gives you the complete harness and bottom bouncer system — harness components or pre-tieds, bouncer weight matched to depth and drift speed, and the anti-twist terminal that keeps everything running clean. Use the presets to cut through decisions fast, or build your kit component by component with the section below.
Last updated: May 2026 · By: FishUSA Staff
How This Setup Works
Five decisions in the right order. Each step is covered below — use the presets to skip straight to a complete list if you want to move fast.
Choose a Harness Option
Pre-tied harnesses are the fastest starting point — swap the whole rig and keep fishing. Components (blades, clevises, beads, hooks) let you fine-tune blade size, hook gap, and leader length for your specific water.
Match Bouncer Weight to Depth
Use the lightest bouncer that keeps you ticking bottom at your trolling speed. General starting point: 1 oz per 10 ft of depth, adjusted up for wind, current, and drift speed.
Set Your Leader Length
Standard range is 36–60 inches. Clear water and short strikes push you longer. Stained water and active fish let you run shorter for easier boat management.
Dial Speed + Blade Size
Speed determines blade thump. Most harness setups produce best at 1.0–1.8 mph. Blade size follows speed — slower speeds need smaller blades that spin at lower RPM; faster speeds can carry a larger blade.
Run Quality Swivels
Ball-bearing swivels between the bouncer and the leader are not optional — a spinning blade creates constant rotational force. A quality swivel prevents leader twist that kills your presentation within minutes.
Need the when + where playbook?
This page covers what to buy and how to use it. For staging locations, seasonal timing, and reading contours, start at the Walleye Harness Hub.
Pick a Preset (Fast)
Three starting points based on conditions and depth range. All cover the same core system — presets make the first decision for you so you spend less time in the tackle aisle and more time on the water.
Budget Starter
Best for: first harness setup, moderate depth (15–25 ft), inland lakes, calm-to-light-wind days with a simple two-color blade rotation.
- 2–3 pre-tied harnesses (natural + one contrast blade)
- 1 oz and 1.5 oz bottom bouncers
- Ball-bearing barrel swivels (size 5)
- Fluorocarbon leader material, 10–12 lb
Core System
Most PopularBest for: most Great Lakes and inland summer contour trolling, moderate wind, 15–35 ft depths, two-rod spread.
- 3 harnesses — Indiana natural, Colorado contrast, Wormburner
- 1, 1.5, and 2 oz bottom bouncers
- Ball-bearing swivels + quick-change snaps
- Fluorocarbon leader, 10–14 lb, 48–60 in
- Natural (gold/copper) + contrast (orange/chartreuse) blades
Rough Water / Deep Control
Best for: Great Lakes wind, faster drifts, deeper contour edges (30–50+ ft), and staying in the strike zone when conditions make control difficult.
- 4 harnesses — Indiana natural, Colorado contrast, Smile Blade, Wormburner
- 2 and 3 oz bottom bouncers
- Heavier-duty ball-bearing swivels (size 3–4)
- UV and high-visibility blades (hot orange, chartreuse, firetiger)
- 14–17 lb fluorocarbon leader
- Larger hook gap (size 2 trailing hook)
Harness + Bottom Bouncer System — Bundle Builder
All products shown below. Items in your selected kit are pre-checked — adjust to match your water and depth.
What’s included
- • Harnesses matched to your kit tier
- • Bottom bouncer weights for your depth range
- • Fluorocarbon leader material
- • Ball-bearing swivels and quick-change snaps
Swap guidance
- • Stained water or cold front? Try a Colorado blade
- • Losing bottom contact? Add one oz of bouncer weight
- • Line twist after each pass? Check and replace swivel
- • Uncheck items you already own
Harnesses3 Selected
Bottom Bouncers3 Selected
Mainline1 Selected
Leader Material1 Selected
Swivels + Snaps2 Selected
Trailing Hooks1 Selected
Three rules before you add to cart
Start simple: one natural blade + one contrast blade covers most days. Blade variety is useful; blade overload is not.
Control first: if you’re not ticking bottom consistently, increase bouncer weight one step or reduce speed before you change anything else.
Swivels are not optional: a harness blade creates continuous rotational force. A quality ball-bearing swivel is the cheapest problem you can prevent.
Parts List (Shoppable)
Everything you need, organized by category. Expand each group to see details and shop links.
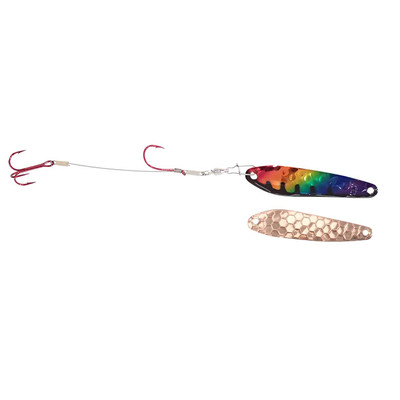
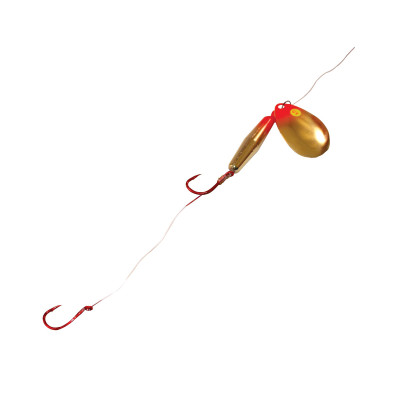
Harnesses — Natural + Contrast
Start with one natural blade and one contrast option. In clear water, Indiana blades produce best at moderate trolling speed. Colorado blades give slow, thumping vibration for stained water or cold fronts. Smile blades add a flutter action when fish are selective. Wormburners produce a tighter, faster action that can trigger fish when standard harnesses get ignored. Float'N harnesses lift the bait off bottom slightly — useful in rocky or snag-prone structure.
Recommended: Northland Pro Crawler Harness (natural) + Mr. Walleye Colorado Crawler Hauler (contrast) as your starting pair. Add the Dreamweaver Wormburner when fish want a tighter, faster presentation. Carry 3–5 total rigs per trip.


Bottom Bouncers — 1 to 3 oz
Start with 1 oz of bouncer weight per 10 feet of depth as a baseline, then adjust for drift speed and current. Carry at least 1, 2, and 3 oz per trip — wind and depth change faster than bites. Adding weight one step is always faster than slowing down.
Recommended minimum carry: 1 oz, 1.5 oz, 2 oz, and 3 oz. Step up one size when you lose bottom contact; step down when you feel the bouncer dragging.

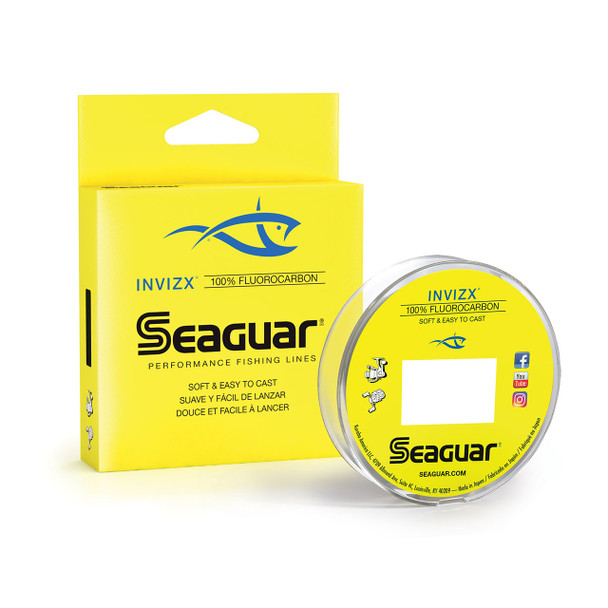
Line — Mainline + Leader
Mono mainline (10 lb) is the standard for harness fishing — the stretch cushions hooksets and absorbs shock when the bouncer snaps off rocks. In ultra-clear water, straight fluorocarbon mainline reduces visibility end-to-end. Pair either mainline with a Seaguar Blue Label fluorocarbon leader for the final connection to the harness.
Recommended: Berkley Trilene XL on the reel + Seaguar Blue Label as the leader for most conditions. Switch to Seaguar InvizX straight fluorocarbon mainline in clear water above 6 ft visibility.


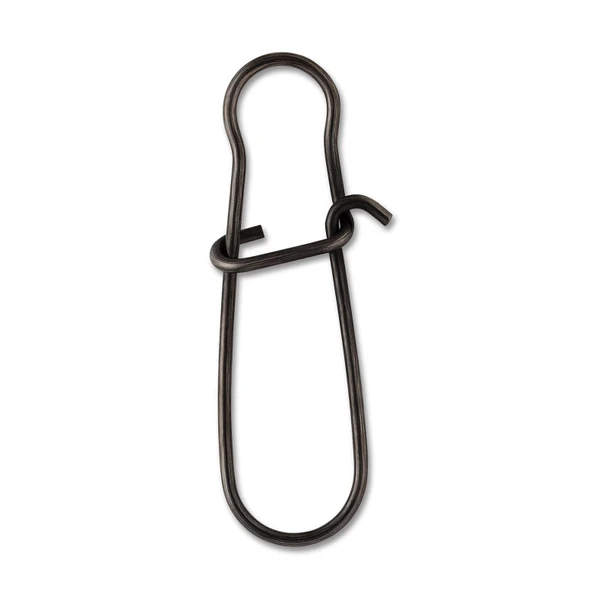
Swivels + Snaps — Anti-Twist Terminal
A spinning harness blade creates constant rotational force. A ball-bearing swivel between the bouncer and leader stops that force from spiraling your mainline. Quick-change snaps let you swap harnesses without cutting and re-tying the leader. Both are required components, not optional.
Recommended: size 5–7 ball-bearing swivel for the bouncer connection. Size 1 Duolock or Crankbait snap at the harness end for quick swaps.


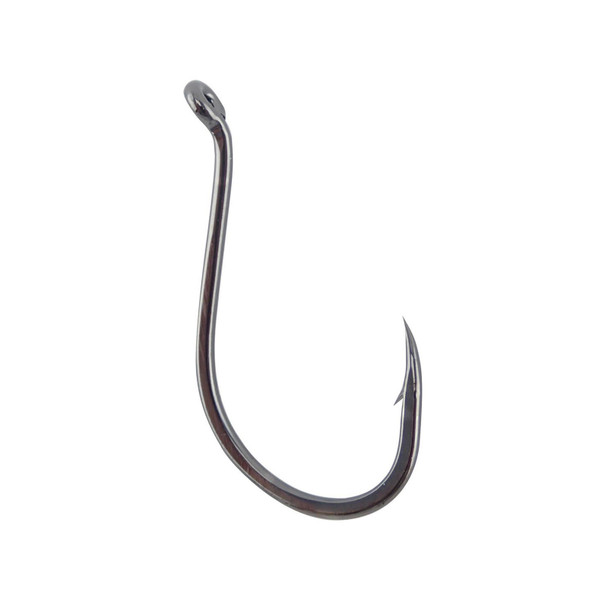
Trailing Hooks — Stinger Setups
Pre-tied harnesses already include hooks, but keeping a supply of loose octopus hooks lets you replace dull or bent hooks without retiring the entire rig. A red chrome finish adds a subtle attractor element near the bait. Size 2 is the standard for crawlers — large enough to hold the worm, small enough not to impede action.
Recommended: Gamakatsu Octopus Size 2 · Red Chrome. Economy packs give you enough to refresh hooks all season.
What you can skip
Two harnesses (one natural + one contrast) cover most days. Ball-bearing swivels and Duolock snaps are required, not optional — skip them and you’ll have twisted mainline within 20 minutes. Skip the heavier bouncers (3 oz) if you fish shallow inland lakes under 25 feet. Loose hooks are only needed if you want to re-rig worn harnesses instead of swapping the whole rig.
Speed + Blade Rules (Quick Chart)
Trolling speed drives blade rotation and fish response. Blade size and color follow from speed and water conditions — not the other way around. Set your speed first, then match the blade to it.
| Situation | Starting Speed | Blade Size | Color Direction | Change First |
|---|---|---|---|---|
| Clear + pressured | 1.0–1.3 mph | #2–3 Colorado or #4 Indiana | Natural metallic (gold, copper, hammered silver) | Leader length before color |
| Stained / wind chop | 1.3–1.8 mph | #4 Colorado or #5 Indiana | High-contrast (chartreuse, orange, UV red) | Blade color before adding more rods |
| Cold front / neutral fish | 0.9–1.2 mph | #2 Colorado or smaller Indiana | Natural + subtle flash (copper, hammered gold) | Slow down before switching spots |
| Warm water / active fish | 1.5–2.0 mph | #5–6 Indiana or #4 Colorado | Bright (firetiger, chartreuse/orange) | Increase speed if blade stalls |
Blade style quick reference
Colorado blade: wide, round profile — more thump and vibration at slower speeds. Best for stained water, cold water, and slower trolling passes.
Indiana blade: narrower, teardrop profile — spins at higher RPM, produces less drag. Better for faster speeds and clear water where a subtler presentation works.
Willowleaf blade: long and slim — minimal drag, spins tight and fast. Best for very fast trolling or when downsizing is the goal in clear-water pressure.
Full breakdown with color-by-clarity and UV rules: Harness blade size & color rules
Bottom Bouncer Weight Chart (Depth + Drift Speed)
Your goal is consistent bottom ticks — the wire tip should brush bottom periodically, not drag continuously. If you’re plowing, reduce weight or increase speed. If you lose contact on the fall, add weight before you do anything else.
| Depth | Light drift (<1.0 mph) | Moderate drift (1.0–1.5 mph) | Fast drift / current (>1.5 mph) | Notes |
|---|---|---|---|---|
| 10–20 ft | 1/2–1 oz | 1–1.5 oz | 1.5–2 oz | Keep wire angle near 45°; over-weighting in shallows kills feel |
| 20–35 ft | 1–1.5 oz | 1.5–2.5 oz | 2.5–3.5 oz | Most common Great Lakes summer trolling range |
| 35–50 ft | 2–3 oz | 3–4 oz | 4–5 oz | Control > finesse; increase weight first if you lose contact |
| 50+ ft | 3–4 oz | 4–5 oz | 5+ oz | Check wire angle — you want 40–50°, not straight down |
Wire angle is the diagnostic
Watch the angle of your bouncer wire off the rod tip. A 45° angle is the sweet spot — light enough to feel bottom, heavy enough to stay in contact. Straight down means you’re over-weighted or too slow. Near-horizontal means you need more weight or you’re too fast. Adjust weight in single steps before changing speed.
Full guide with current and rocky bottom adjustments: Bottom bouncer weight rules
Leader Length Rules (When Longer Wins)
Leader length controls how far the harness rides behind the bouncer and how much time a fish has to look at it before committing. Most anglers default to 48 inches — that works for most situations. Adjust from there based on what fish are telling you.
- Standard range (36–60 in): covers most conditions. Start at 48 inches and adjust from there based on bite quality and water clarity.
- Clear water / pressured fish (5–7 ft): longer leaders put more distance between the wire and the harness, giving finicky fish more time to commit without seeing the bouncer. This is the single most-overlooked adjustment in tough conditions.
- Stained water / active fish (36–48 in): shorter leaders are easier to manage and still produce. Fish locate the blade faster in reduced visibility; extra distance doesn’t help as much.
- Short strikes (fish nipping the tail hook): extend the leader 12–18 inches before changing anything else. Short strikes often mean fish are following from the rear and not fully committing — more distance gives them time to turn and eat.
- Rocky or snaggy bottom: shorter leaders reduce the chance of the harness catching rocks during each bounce. Drop to 36 inches and slow down slightly to reduce snagging.
- Leader material: fluorocarbon (10–14 lb) is the standard choice — low-vis, abrasion-resistant, and sinks to keep the harness in the zone. Check the leader for nicks after every fish or snag.
Full guide with knot recommendations and leader-to-hook spacing: Harness leader length rules
Troubleshooting (Fast Fixes)
Line twist / harness spinning
- Check your swivel first — pull it off the leader and spin it by hand. It should rotate freely with almost no resistance. If it binds or has grit in the bearing, replace it.
- Confirm your trolling speed is inside the blade’s optimal spin range. Blades spinning too fast create more rotational force than any swivel can handle.
- Re-spool after a badly twisted day rather than fishing through the twist — twisted leader material weakens and kills presentation.
No bites
- Step 1 — change speed: bump up or down 0.2 mph. Fish that ignore a blade at 1.2 mph sometimes bite immediately at 1.5 mph, or vice versa after a cold front.
- Step 2 — change blade color: switch from natural to contrast, or vice versa. Give each color at least two passes over the same structure before deciding it doesn’t work.
- Step 3 — adjust leader length: extend 12–18 inches if you suspect fish are following but not committing.
- Step 4 — check the bait: a soft or fouled crawler produces almost nothing. Fresh bait is as important as blade selection.
Snagging constantly
- Increase trolling speed slightly — a faster drift angle keeps the wire tip up and skims bottom rather than plowing into it.
- Reduce bouncer weight one step if speed adjustment doesn’t help. You want ticks, not a plow.
- Shorten the leader to 36 inches when fishing rocky structure so the harness rides higher off the hardest snag points.
Blade not spinning (or spinning wrong)
- Pull the rig and check for weed, algae, or zebra mussel debris on the blade or clevis. Even a small piece of weed stops a blade cold.
- Confirm the clevis is seated correctly on the spinner shaft — a folded or cracked clevis won’t allow proper blade rotation.
- Check that speed is in range for the blade size. A #5 Indiana requires more water pressure to spin than a #2 Colorado at the same speed.
Running too fast or too slow
- If you’re over-spinning the blade (it helicopters instead of rotating cleanly), drop speed 0.2 mph or switch to a smaller blade at the same speed.
- If the blade barely spins, either increase speed or switch to a blade with a wider profile (Colorado vs Indiana) that generates rotation at lower RPM.
- Use a speed-and-temp unit if you don’t have one — surface speed and actual trolling speed can differ significantly with wind and current. Know what speed is actually at the bouncer, not just the boat.
Need a different coverage approach? Walleye Trolling Hub covers open-water and lead-core setups when harnesses aren’t the right tool.
Read Next
Dig deeper on the specific decisions that move the needle in harness fishing.
FAQ
Common questions on harness speed, bouncer weight, leader length, and keeping the system running clean.