

Walleye Leader Strength + Length Guide (Jigging, Jerkbaits, Trolling)
Walleye Leader Strength + Length Guide (Jigging, Jerkbaits, Trolling)
The right leader is a balance between stealth, strength, and control — and that balance shifts by technique and water condition. This guide gives you practical starting points for leader strength and length across jigging, jerkbaits, trolling, and harnesses, plus the abrasion checks that matter more than most anglers think.
Last updated: June 2026 · By: FishUSA Staff
Quick Start
If you only read one section
- 10 lb fluoro leader is the best all-around spring jigging default.
- 8 lb is better for ultra-clear water and finicky fish.
- 12 lb is better for rocks, zebra mussels, rough water, night fishing, and abrasion.
- Longer leaders help in clear/calm water — fish get a longer look, so stealth matters more.
- Shorter leaders are easier to manage in stained water, wind, and current.
- Braid-to-fluoro is the most sensitive default for jigging.
- Straight fluoro can be simpler when you want more stretch or fewer knots.
- Retie when the leader feels nicked, cloudy, curled, or rough.
Default recommendation
For most spring walleye jigging: 10 lb braid to a 10 lb fluorocarbon leader, adjusted up or down based on clarity and abrasion.
A leader is one of the smallest pieces of your walleye setup, but it’s also one of the most overlooked when bites slow down. Get the strength and length right for your technique and water, and you can stop second-guessing whether your leader is the problem.
Why Leader Matters
A leader does several jobs at once. Understanding what each one actually does makes it much easier to decide when to size up, size down, or change length.
Stealth
Fluorocarbon is far less visible underwater than braid, especially in clear water where walleye get a longer look at your presentation. The leader is the last few feet the fish sees before committing — it's worth getting right.
Abrasion Resistance
Rocks, zebra mussels, dock cables, and rough bottom all chew on line. A leader gives you a sacrificial, replaceable section near the lure instead of wearing down your whole spool of mainline.
Shock Absorption
Fluorocarbon has more give than braid, which helps cushion hooksets and headshakes — particularly important on light wire hooks where a stiff, low-stretch connection can pull hooks on a hard strike.
Lure Action
Leader diameter and stiffness affect how a jig falls or a jerkbait darts. A leader that's too heavy for the bait can mute action; one that's well-matched lets the lure work the way it was designed to.
Depth and Control
Leader length changes how far your lure rides from the mainline connection — which affects fall angle on a jig and how much "feel" travels from bait to rod tip, especially on a braid-to-fluoro setup.
Confidence and Retying
A fresh, undamaged leader means you're not wondering whether that last big fish weakened your connection. Knowing your leader is sound lets you fish harder and set the hook with full confidence.
Leader Strength Chart
Use these as starting points, not absolutes. Step up when abrasion or rough conditions justify it; step down when stealth is the priority and cover is minimal.
| Situation | Starting Leader Strength | Why | When to Change |
|---|---|---|---|
| Clear water / finicky fish | 8 lb | Thinnest diameter for the least visibility when fish get a long look | Size up to 10 lb if you start losing fish on the hookset or fight |
| Standard spring jigging | 10 lb | Balances stealth, strength, and abrasion resistance for most conditions | Drop to 8 lb in extra-clear water; step to 12 lb near structure |
| Rocks / zebra mussels / rough bottom | 12 lb | Added strength resists nicks and cuts from sharp structure | Inspect after every snag; retie sooner here than anywhere else |
| Night shore casting | 12 lb | Harder to inspect line in the dark, so extra margin for abrasion helps | Step down to 10 lb if you're fishing clean bottom with no structure |
| Jerkbaits | 10–12 lb | Enough strength to handle hard, sweeping hooksets on a bigger profile bait | Step to 12 lb around wood, rock, or other cover-heavy water |
| Trolling crankbaits | 10–14 lb | Mainline and lead length matter more here, but the leader still needs to handle sustained pressure at trolling speed | Step up with bigger cranks, deeper divers, or aggressive fish |
| Harnesses / bottom bouncers | 15 lb+ | Dragging bottom constantly means more contact with rock and structure | Only go heavier than 15 lb when cover or bottom type clearly justifies it |
Keep the claims realistic
There's no single "right" leader strength for walleye. These ranges are starting points that work for the large majority of situations — adjust based on what you're actually seeing on the water, not just the chart.
Leader Length Chart
Length is about control versus stealth. Shorter leaders are easier to manage and retie quickly; longer leaders put more distance between your mainline and the lure.
| Situation | Starting Leader Length | Why | Adjustment |
|---|---|---|---|
| Clear + calm | 6–10 ft | More distance from the mainline when fish have time to inspect the presentation | Extend to 10+ ft in ultra-clear or heavily pressured water |
| Stained + wind | 2–4 ft | Shorter leaders are easier to control and cast in choppy conditions | Lengthen slightly if fish seem line-shy despite the stain |
| Vertical jigging | 2–4 ft | A direct, short connection keeps feel close to the rod tip | Shorten further if you're constantly fighting the knot through guides |
| Casting jigs from shore | 4–6 ft | Balances castability with enough stealth for shoreline-pressured fish | Shorten for windy nights; lengthen in calm, clear conditions |
| Jerkbaits | 4–6 ft | Enough stealth without making casting or twitching cadence awkward | Shorten slightly if the knot is interfering with your cadence |
| Trolling with snaps/cranks | 6–10 ft | More separation from the snap and mainline at trolling speed | Shorten in stained water or when running a high rod count |
| Rocks / mussels | 2–4 ft | Less leader material exposed to abrasion, and faster to retie when needed | Check and retie often regardless of length |
| Night shore fishing | 4–6 ft | Enough stealth for low-light feeding fish without complicating casts in the dark | Shorten if you're fishing tight to structure you can't see well |
By Technique
The strength and length charts above are starting points. Here's how each technique typically adjusts from there.
Jigging
Default: 10 lb fluoro leader. Leader length: shorter (2–4 ft) for vertical control, longer (6–10 ft) in clear water where stealth matters more than direct feel. Jigging is the technique where leader strength and length both move the most depending on conditions, since you're constantly adjusting for depth, clarity, and bottom type on the same trip. See the Spring Jigging Setup for the full rod, reel, and line system this leader fits into.
Jerkbaits
Jerkbait leaders run 10–12 lb fluorocarbon and 4–6 ft in most conditions. The leader-to-line connection affects how a jerkbait feels through the cadence — a stiff or oversized connection can dull the snap of a sharp twitch. Keep the leader long enough for stealth but not so long that the knot interferes with your retrieve rhythm. See the Walleye Jerkbait Hub for cadence and presentation, and the Cold-Water Jerkbait Setup for the complete gear system.
Trolling Crankbaits
For trolling systems, lead length, mainline diameter, and snap choice usually matter more than leader length specifically — the lead length is what controls running depth, not the leader. Leader strength (10–14 lb fluorocarbon) still matters for handling sustained pulling pressure at speed. See Lead Length Rules for Cranks for the depth side of the equation and the Trolling Starter Spread for the full setup.
Harnesses / Bottom Bouncers
Harnesses and bottom bouncers drag bottom continuously, so abrasion is the dominant concern — not stealth. Run 15 lb+ leader material, use a quality ball-bearing swivel to prevent line twist from the spinning blade, and expect to retie more often than with jigging or casting techniques. See the Harness + Bottom Bouncer Setup for the complete rig.
Clear vs. Stained Water
Water clarity is the single biggest factor in leader decisions. The rule is simple once you frame it correctly.
- Clear water: longer leader, lighter and cleaner presentation. Fish have time to inspect, so stealth wins.
- Stained water: a shorter leader is usually fine; prioritize contact and control over invisibility, since fish are relying less on sight.
- Muddy/rough water: a stronger leader and faster retying matter more than length — you'll be working through more debris and abrasion-prone conditions.
The Change Ladder
When something feels off and you're not sure whether it's the leader, work through these steps in order before you start guessing at color or profile:
- Check for abrasion. Run the leader through your fingers near the knot and down its length.
- Adjust leader length. Shorten in stained or windy water; lengthen in clear, calm water.
- Adjust leader strength. Size up around structure or abrasive bottom; size down for maximum stealth.
- Change profile/color. Only after the leader itself is confirmed sound should you start adjusting the lure.
Abrasion Check
Leader failure is rarely about strength rating — it's almost always about a weak point you didn't catch in time. These are the usual culprits.
- Rocks: sharp edges on rip-rap, boulders, and gravel transitions nick line on contact.
- Zebra mussels: shells are surprisingly sharp and accumulate on hard structure, docks, and rock — a common, often-overlooked source of nicks.
- Docks/shoreline cover: cables, posts, and rough wood all create abrasion points, especially when casting tight to structure.
- Teeth/gill plates: walleye teeth and sharp gill plates can fray a leader during the fight or while unhooking, particularly with a short leader.
- Snags: pulling free from a snag almost always puts stress and abrasion on the section of leader that contacted the obstruction.
Retie now if…
- The leader feels rough when you run it between your fingers.
- You see a visible nick anywhere along its length.
- The knot looks cloudy or curled instead of clean and tight.
- A snap or clip has bent out of shape.
- You've landed multiple fish or worked through several snags since your last check.
Knots + Snaps
Don't overcomplicate this part. A few practical rules cover almost every situation.
- Use the braid-to-leader knot you tie confidently. A double uni, FG knot, or Alberto all work — the best knot is the one you can tie correctly and consistently, especially in cold or low-light conditions.
- Test the knot before fishing. Pull hard on both ends before your first cast. A knot that's going to slip will usually show it under deliberate pressure, not on a fish.
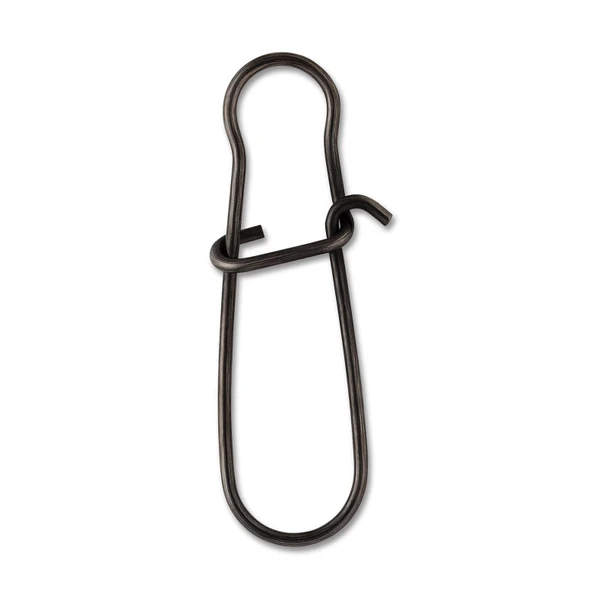
- Snaps are useful for quick lure changes. Swapping baits without re-tying saves real time across a full day on the water.
- Smaller snaps preserve action better. Match snap size to lure size — an oversized snap on a small jig or finesse bait can throw off the balance point.
- Direct tie can be better for ultra-finesse or when action looks muted with a snap attached. If a small bait isn't working the way it should, try removing the snap before changing anything else.
Snaps & Swivels
Quick-change snaps for lure swaps, plus a ball-bearing swivel for harness and trolling connections


Common Mistakes
- Using leader that's too light around rocks or mussels. Stealth doesn't matter if the leader fails on the next abrasive contact.
- Never checking for abrasion. A leader that was fine an hour ago can be one nick away from failing on the next good fish.
- Using a leader that's too short in clear water. Cutting length to save time costs you stealth exactly when you need it most.
- Changing color before checking leader and contact. Confirm your leader and connection are sound before you start swapping baits.
- Using oversized snaps on small baits. A heavy snap on a light jig or finesse plastic can mute the action you're relying on.
- Assuming one leader setup works for every technique. What works for vertical jigging isn't automatically right for jerkbaits, trolling, or harnesses — adjust by technique, not habit.
Gear
A short, practical list — not a sales pitch. These are the categories worth having on hand.
Starter Leader Kit
- 10 lb fluorocarbon leader material
- 12 lb fluorocarbon leader material for abrasion
- 10 lb braid mainline for jigging
- Small snaps
- Line cutters / leader storage
Want the full system?
This guide covers the leader. For the complete rod, reel, line, and terminal setup, go to the Spring Jigging Setup, the Cold-Water Jerkbait Setup, the Walleye Trolling Starter Spread, or the Night Shore Walleye Setup for casting after dark.